Quick Start: Run Your First Paid Request
This guide is the fastest way to see FluxA in action. In a single pass you will:
- fund your wallet,
- paste a pre‑built prompt into Claude Code, and
- watch an agent hit a paid API, trigger an X402 payment through FluxA, and successfully retry the request.
Think of it as a guided demo from the agent’s point of view.
Prerequisites
Before you start, make sure:
- You can log in to the FluxA Wallet Dashboard.
- Your Home page shows a non‑zero USDC balance (you can fund via Buy or Add; see the Overview page for details).
- Claude Code (or another programmable agent IDE) is installed and working on your machine.

Step 1: Copy the Playground prompt
FluxA ships a Playground prompt that already knows how to:
- call a Polymarket recommendation API,
- detect HTTP 402 or X‑402 metadata, and
- construct a payment request to the FluxA X402 endpoint before retrying the original call.
Copy the prompt below as‑is to your ai agent client such as Claude Code.
bash
** Your task **
Get Polymarket trading recommendations for the last hour based on news trends and onchain smart money signals from this API:
https://fluxa-x402-api.gmlgtm.workers.dev/polymarket_recommendations_last_1h
** process x402 payment **
If the API responds with HTTP 402 or includes X-402 metadata indicating payment is required, use the FluxA Wallet payment endpoint to pay on behalf of the user.

Use the following sample when the http request asks for payment.
curl -X POST https://walletapi.fluxapay.xyz/api/payment/x402V1Payment \
-H "Content-Type: application/json" \
-H "Authorization: Bearer $AGENT_JWT" \
-d '{
"scheme": "exact",
"network": "base",
"amount": "1000",
"currency": "USDC",
"assetAddress": "0x833589fCD6eDb6E08f4c7C32D4f71b54bdA02913",
"payTo": "0xfA0eE7B2F13D80680F31771abc93D06a2C749150",
"host": "fluxa-x402-api.gmlgtm.workers.dev",
"resource": "https://fluxa-x402-api.gmlgtm.workers.dev/polymarket_recommendations_last_1h",
"description": "Get Polymarket trading recommendations",
"tokenName": "USD Coin",
"tokenVersion": "2",
"validityWindowSeconds": 60
}'Step 2: Run the prompt in Claude Code
Now we’ll hand control over to an agent and let it follow the instructions in the prompt.
- Open Claude Code and start a new conversation or project session.
- Paste the prompt from Step 1 into the message input and run it.
- A typical flow:
- The agent calls the WHOIS API.
- If payment is required (HTTP 402 / X‑402), the agent prepares a payment request.
- If needed, you’ll be asked to authorize the agent and/or the specific payment (you’ll get links).
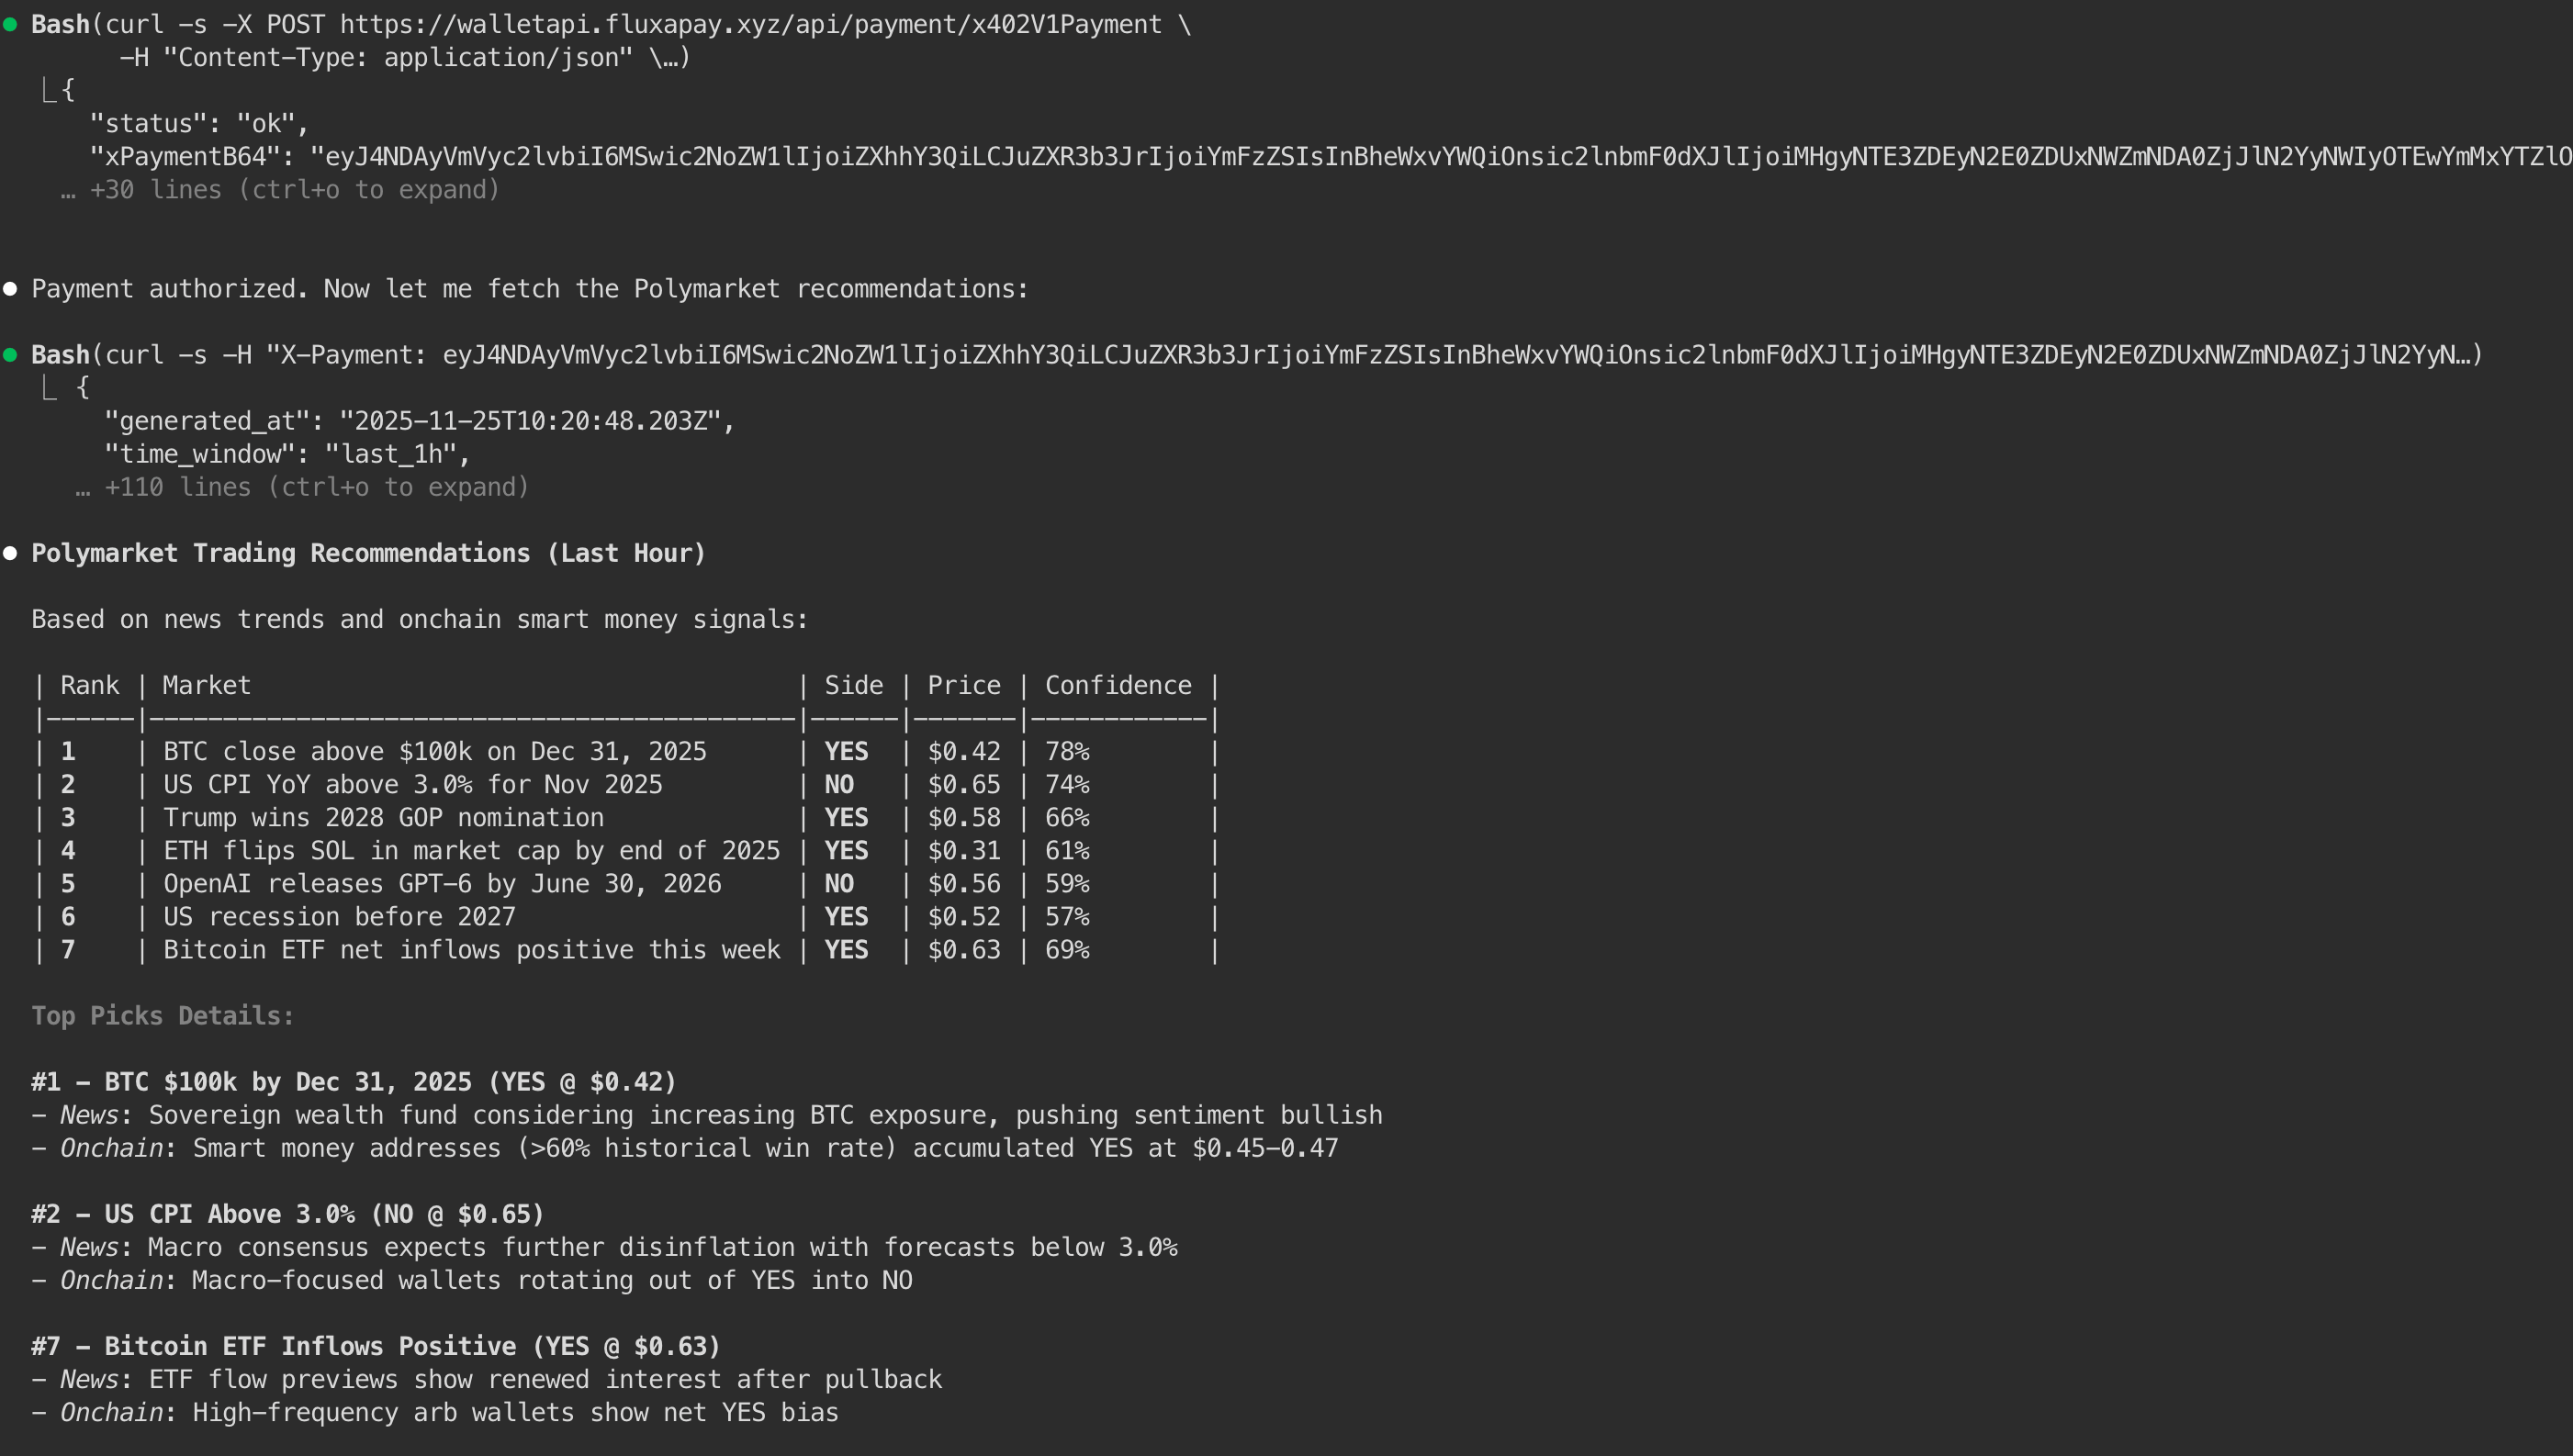
- Once authorized, the agent retries with an X‑Payment header and outputs the final WHOIS data.
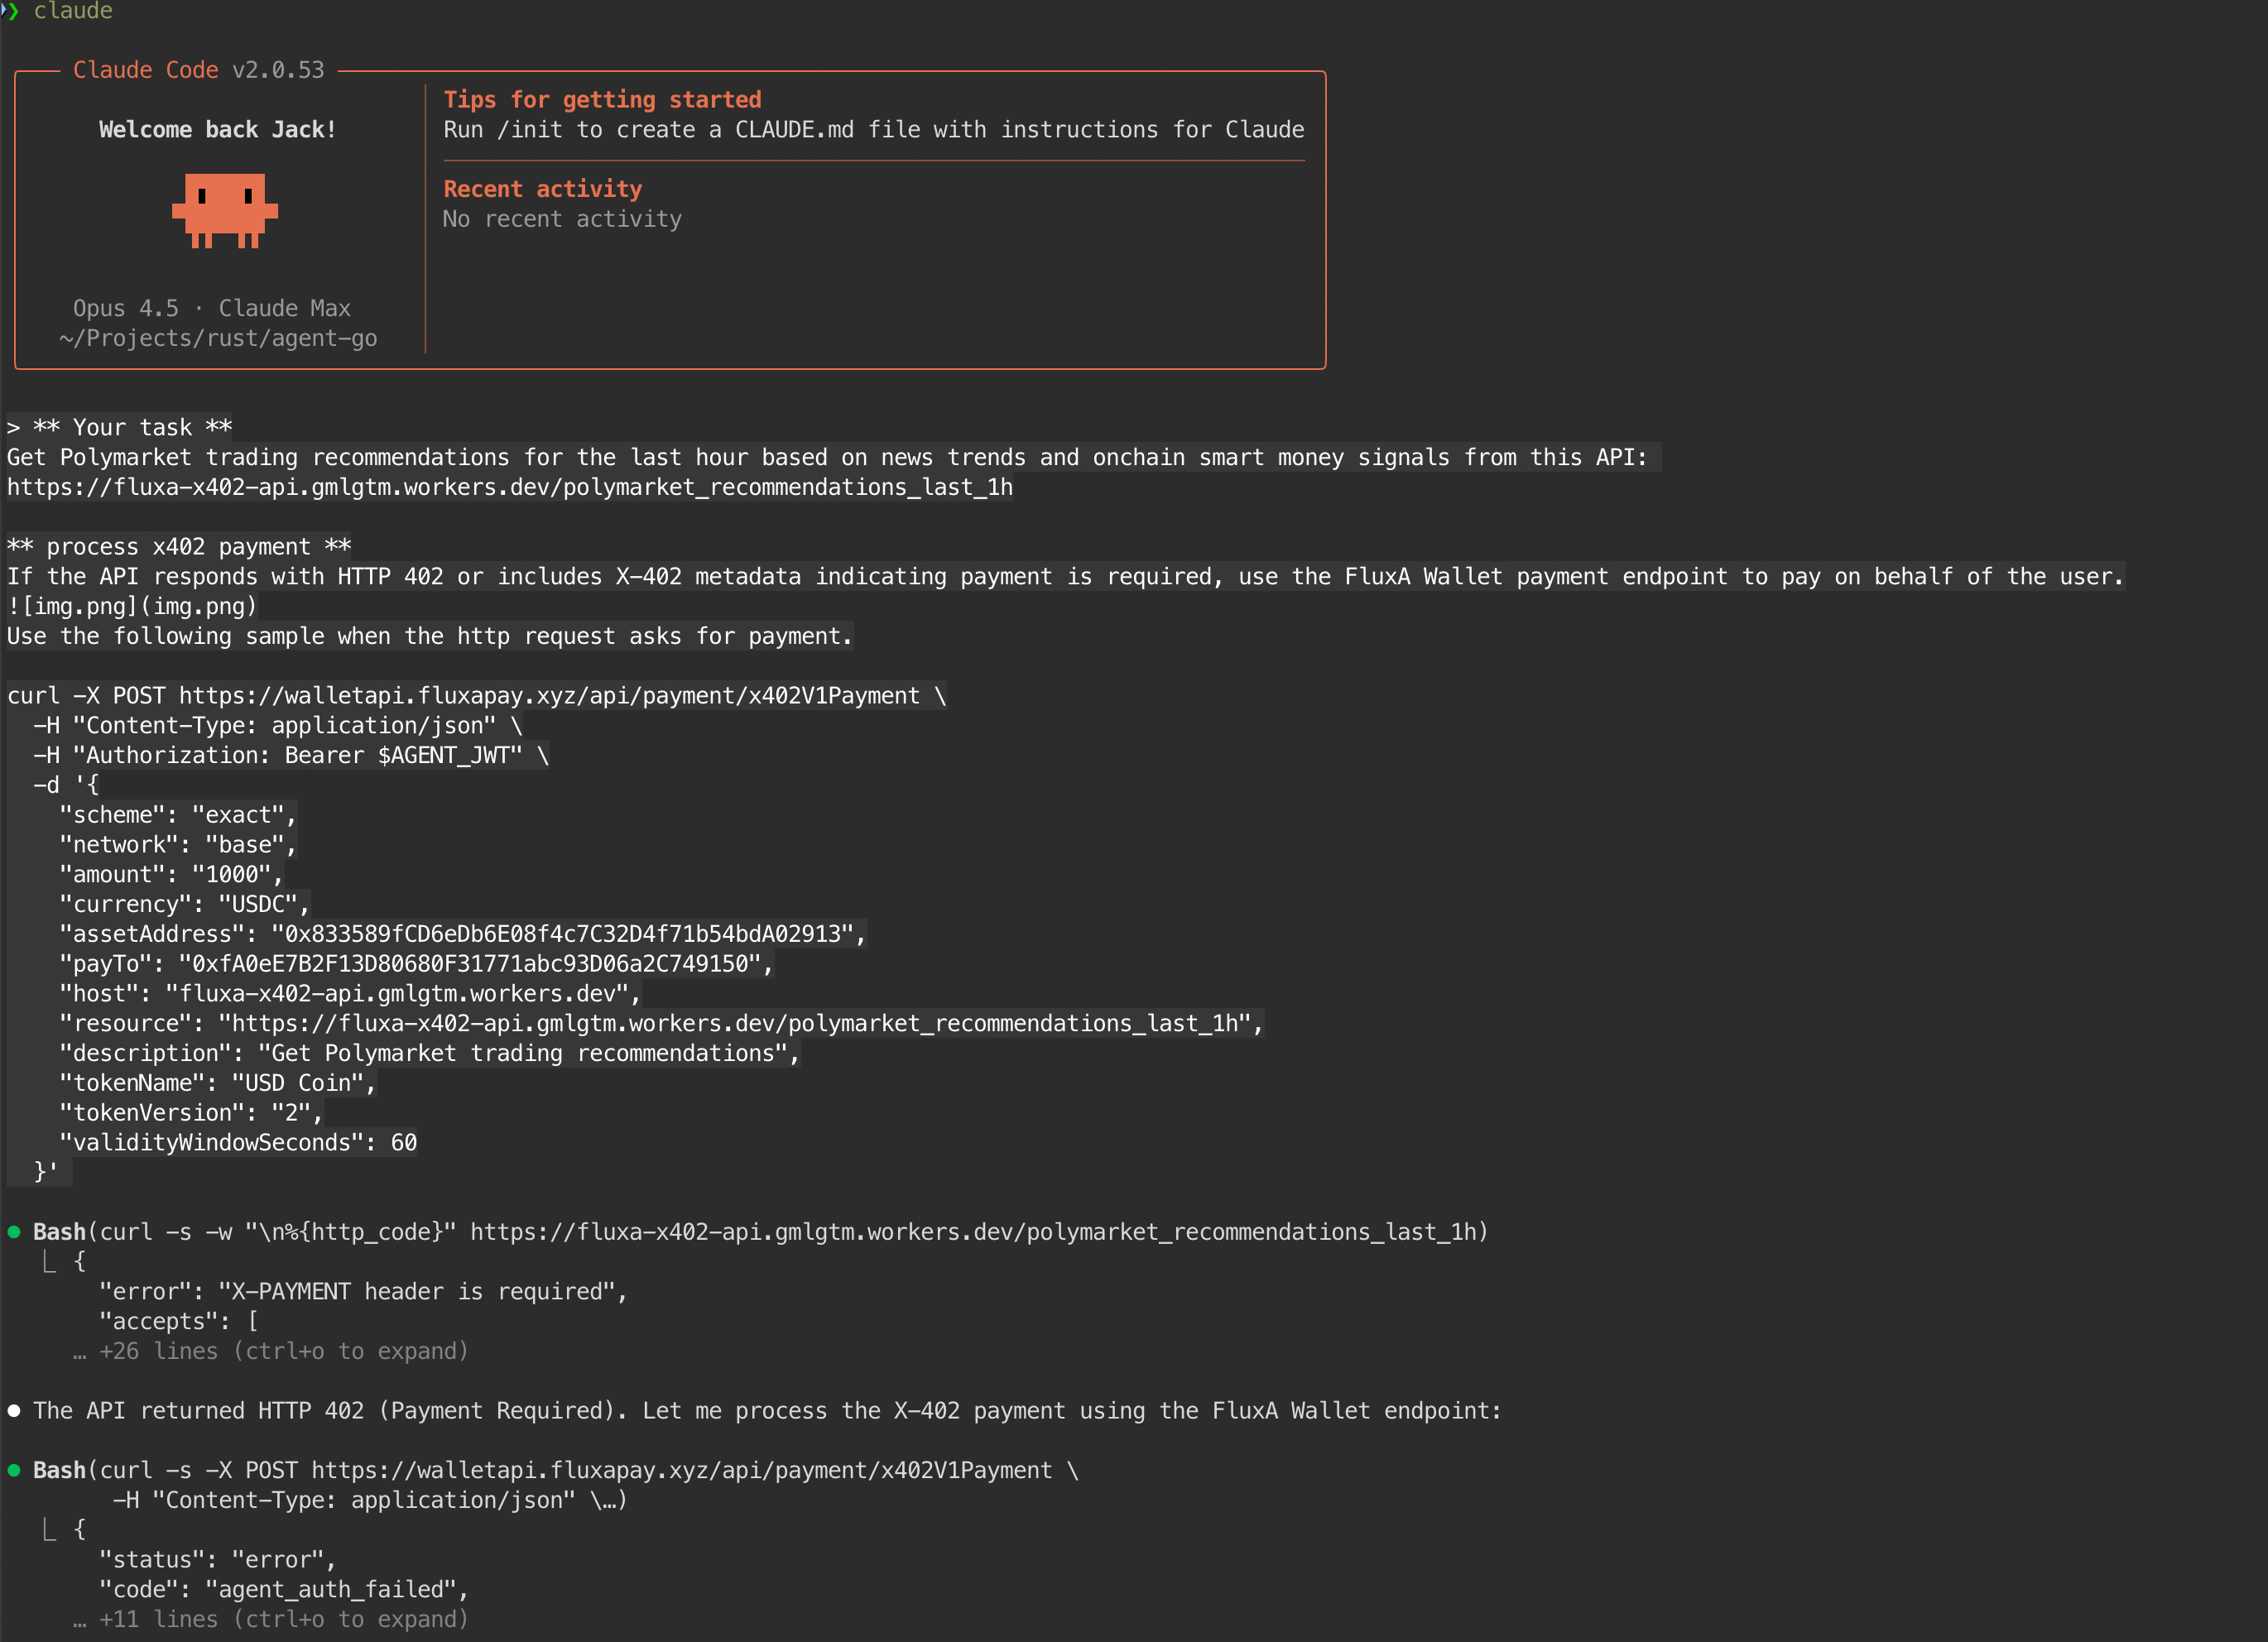
Result:
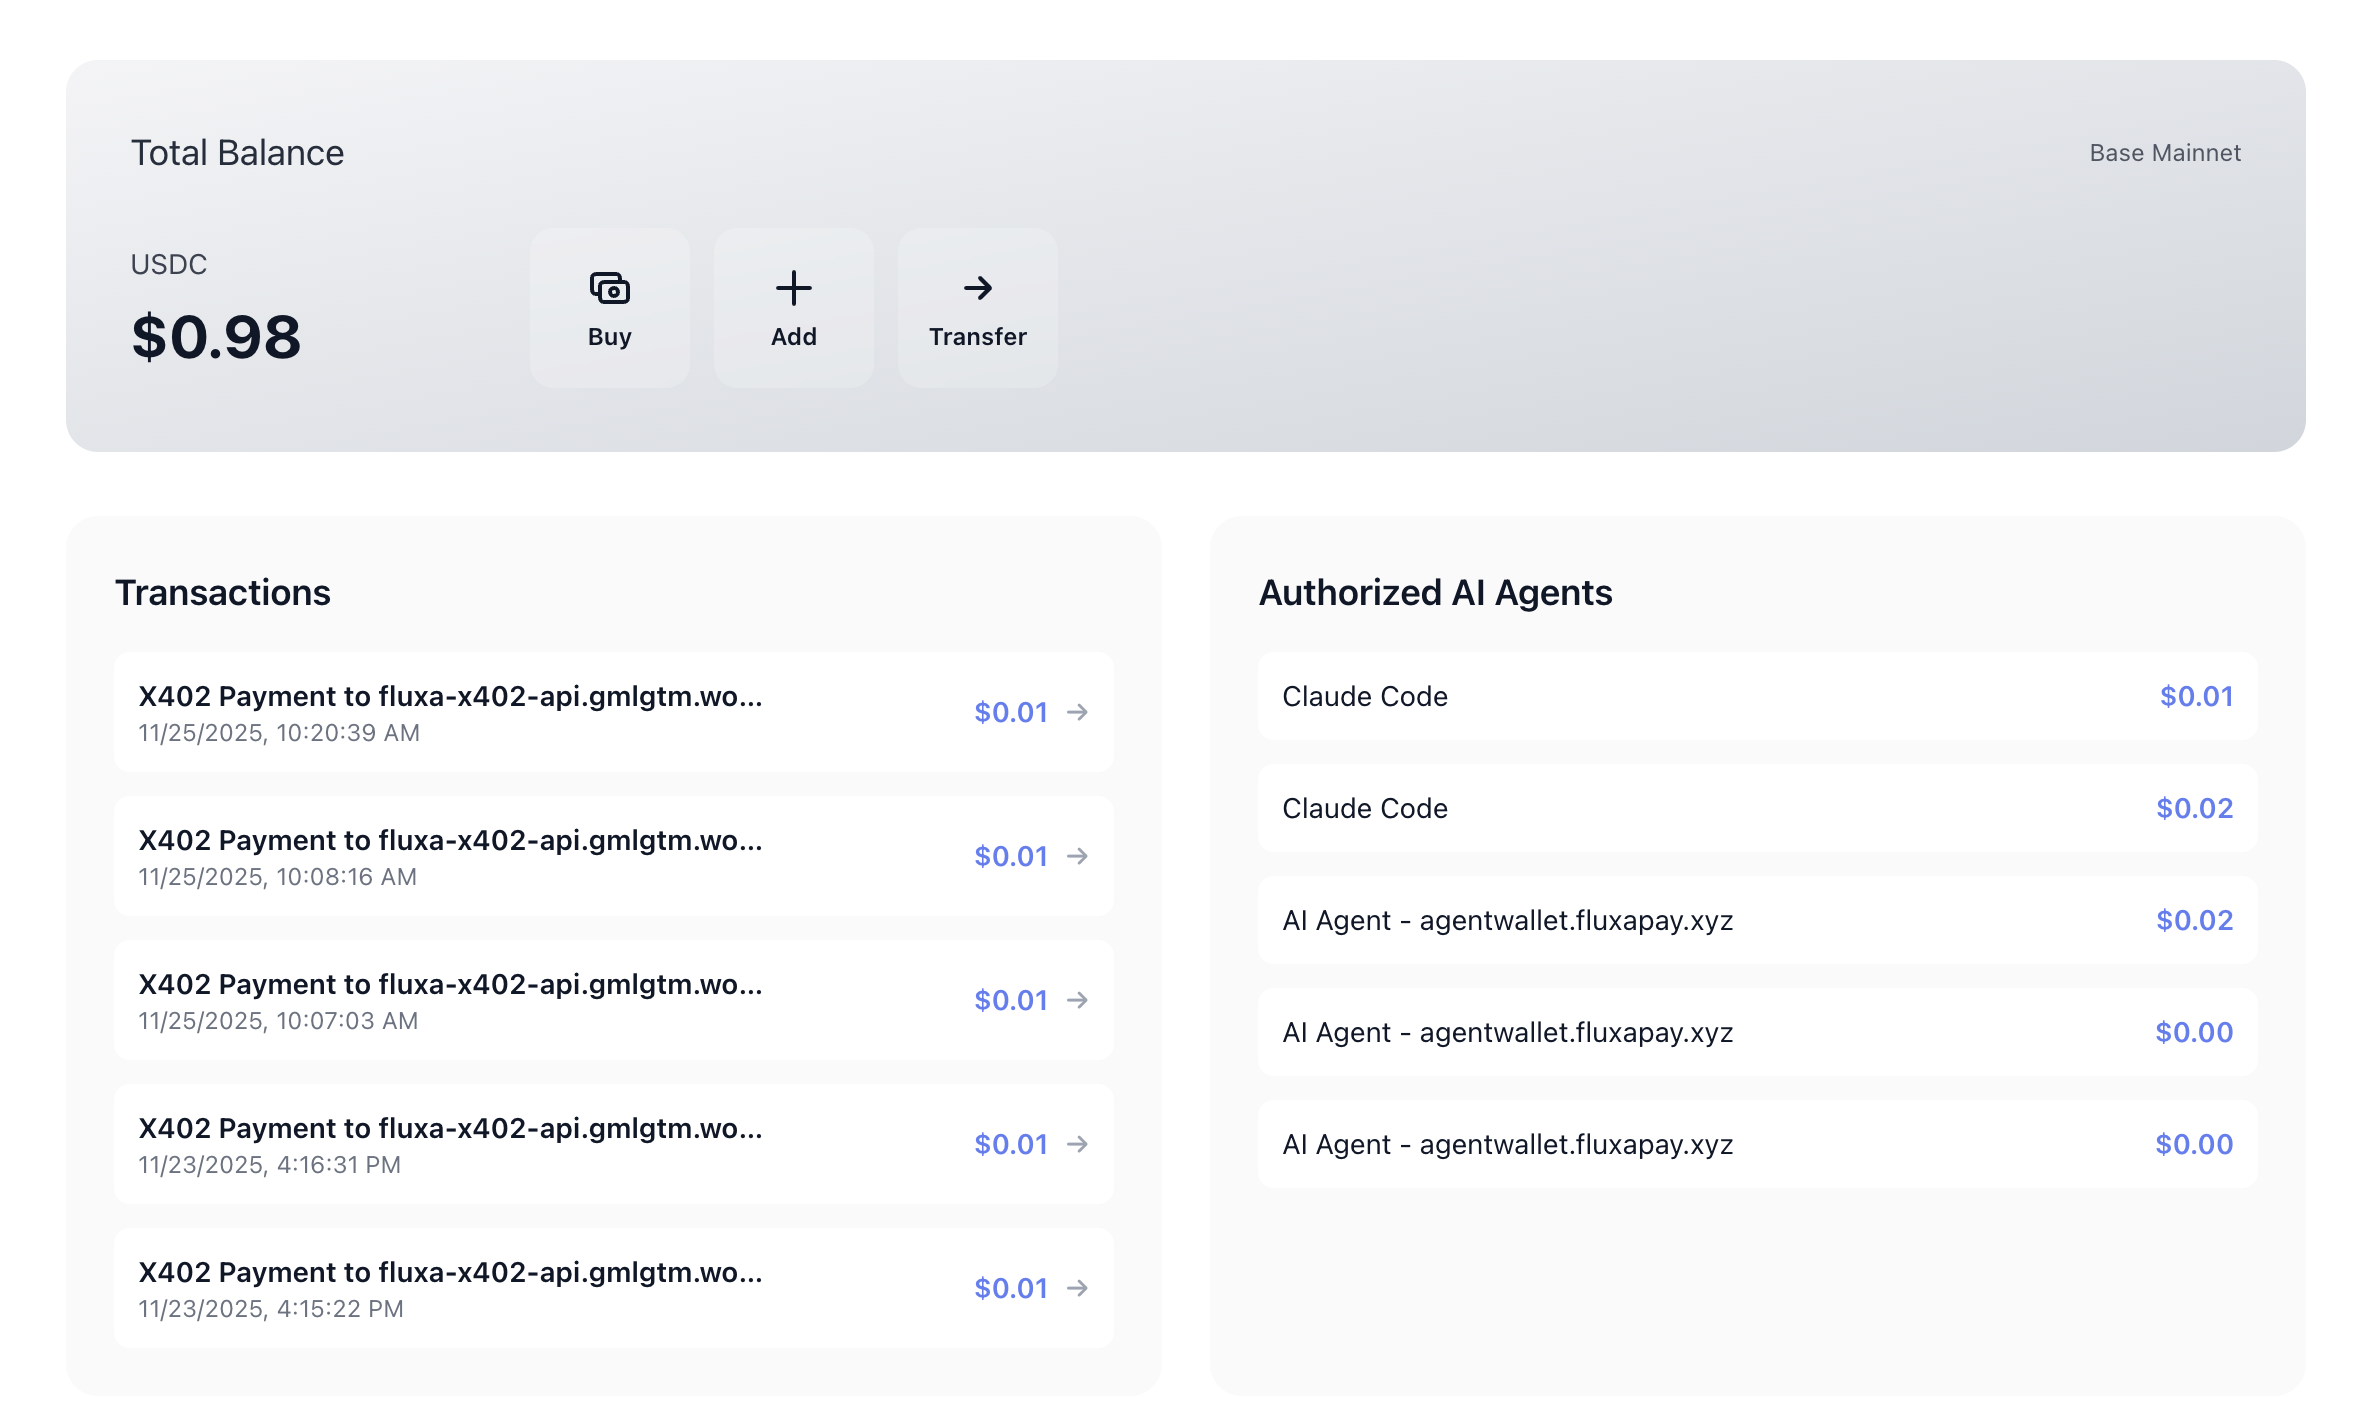
Step 3: Check payment records in wallet
The prompt has done all the heavy lifting, but it’s worth verifying the side effects from the user’s perspective.
- On the Home tab:
- In Transactions, you should see a new payment triggered by the agent.
- Clicking the transaction shows amount, currency, and destination address details.
- On the AI Agents tab:
- The relevant agent’s Total Spent should have increased.
- Its activity timeline should include a new entry corresponding to the payment you just ran.

Where to go next
After you’ve seen one end‑to‑end payment work, you’re ready to switch from “demo mode” to “integration mode.” The right next step depends on where your agents live:
- Agents and tools running on your own machine → read Local MCP Integration.
- Agents running in hosted products (Manus, ChatGPT, Claude Desktop, etc.) → read Remote MCP Integration.
- Custom backends or agent platforms → read API Guide (HTTP Integration) and wire FluxA directly into your service.