Monetize MCP Servers
Learn how to monetize your Model Context Protocol (MCP) server and start earning revenue.
Getting Started
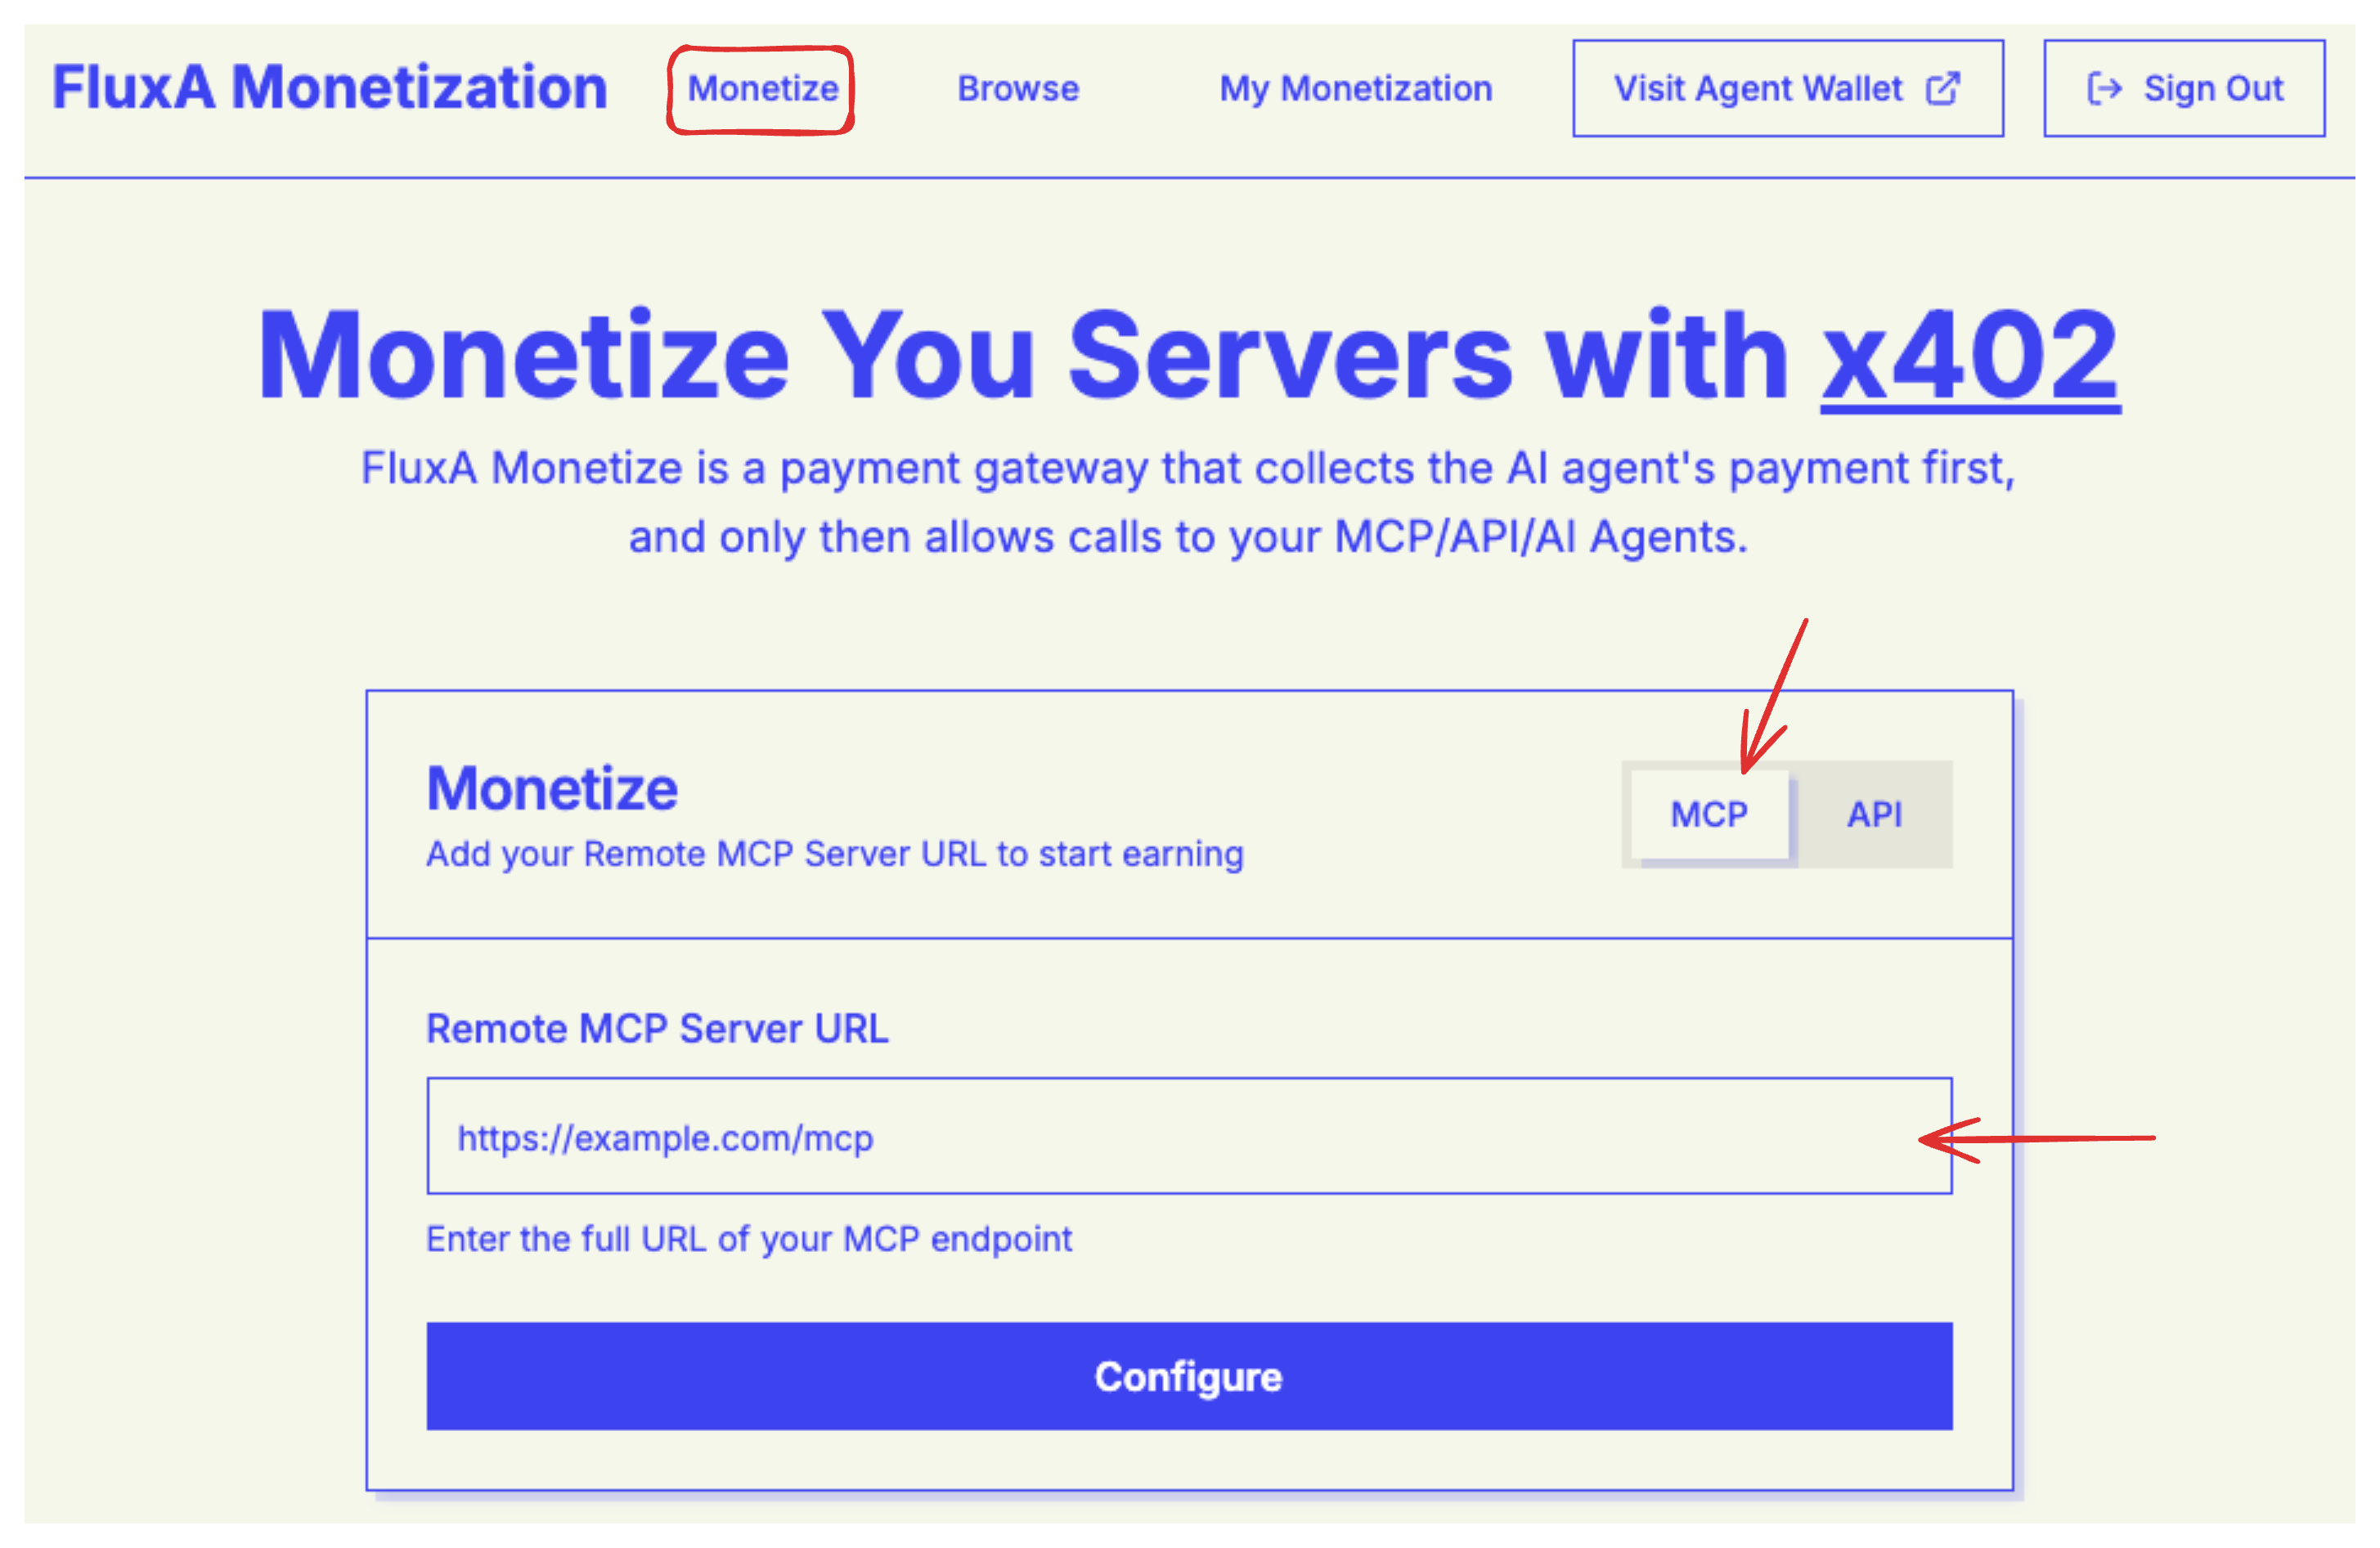
To monetize your MCP server and start earning revenue, navigate to the monetize page.
Step 1: Add Your MCP Server
Begin by entering your MCP server address in the input field. This is the URL where your MCP server is hosted and accessible.
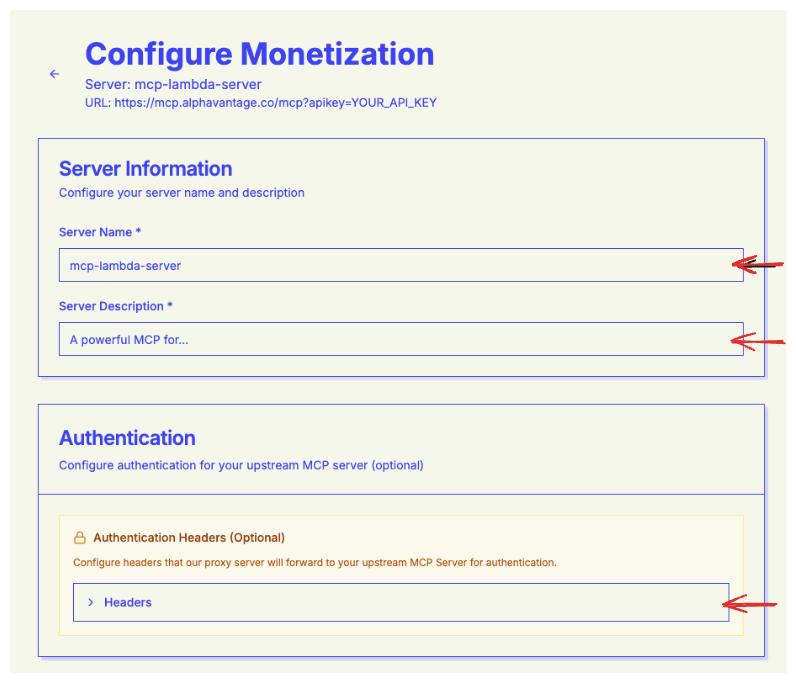
Step 2: Configure Server Details
Next, you'll need to configure your server's basic information:
Server Name (required)
- Choose a descriptive name that helps users identify your MCP server
Server Description (required)
- Provide a clear description of what your server does and what tools it offers
Authentication Header (optional)
- If your MCP server requires authentication, configure the auth header here
- Leave this blank if your server doesn't require authentication
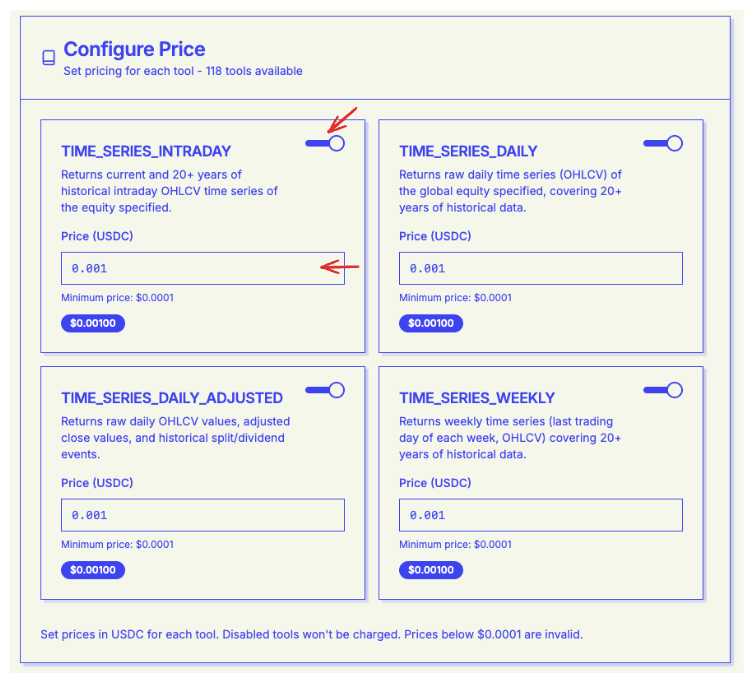
Step 3: Configure Tool Pricing
The Configure Price page displays all available tools from your MCP server. Here you can manage each tool individually:
- Enable/Disable Tools: Select which tools you want to make available to users. You can disable tools that you don't want to monetize or expose
- Set Pricing: For each enabled tool, set the price per usage. This allows you to create a pricing structure that reflects the value and computational cost of each tool
WARNING
All enabled tools must have a minimum price of at least $0.01 per use. This ensures fair compensation for your service while keeping it accessible to users.
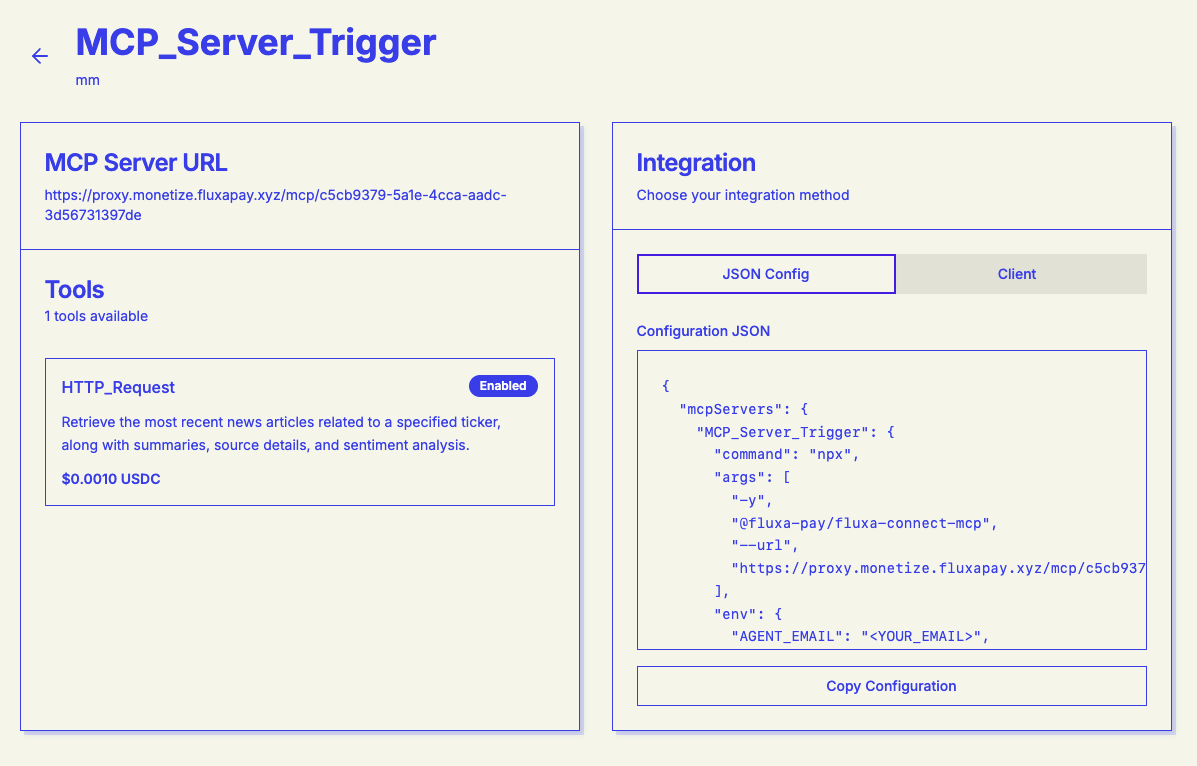
Step 4: Review Integration Details
Once you've completed the configuration, your integration page will display:
- A comprehensive list of all your enabled tools with their pricing
- Integration details and connection information
- Configuration summary for easy reference and management
TIP
You can return to this page at any time to modify your tool settings, adjust pricing, or update server details.
Next Steps
- How Buyers Use MCP → - Learn how buyers integrate your MCP server
- Monetize APIs → - Also monetize your REST APIs