Use MCP Servers
Learn how to integrate and use monetized MCP servers in your applications and workflows.
Integration Methods
We currently provide two integration methods to suit different use cases:
JSON Config
- A versatile, configuration-based approach that works with multiple AI model providers
- Ideal for users who prefer declarative configuration
- Simply copy the provided JSON configuration into your settings file
Client Integration
- A dedicated client library for programmatic integration
- Provides more control and flexibility for advanced use cases
- Best for developers building custom applications
Method 1: JSON Config Integration
The JSON Config method is the simplest way to integrate MCP servers. It involves copying a configuration snippet into your AI provider's settings file.
Supported Platforms
Claude Desktop & Claude Code
Add the configuration to .mcp.json
Qwen Code
Add the configuration to .qwen/settings.json
{
  "mcpServers": {
    "<SERVER_NAME>": {
      "command": "npx",
      "args": [
        "-y",
        "@fluxa-pay/fluxa-connect-mcp",
        "--url",
        "https://proxy.monetize.fluxapay.xyz/mcp/<CONFIG_ID>"
      ],
      "env": {
        "AGENT_EMAIL": "<YOUR_EMAIL>",
        "AGENT_NAME": "Claude Code - agentwallet.fluxapay.xyz",
        "CLIENT_INFO": "Claude Code on macOS"
      }
    }
  }
}
How to Use
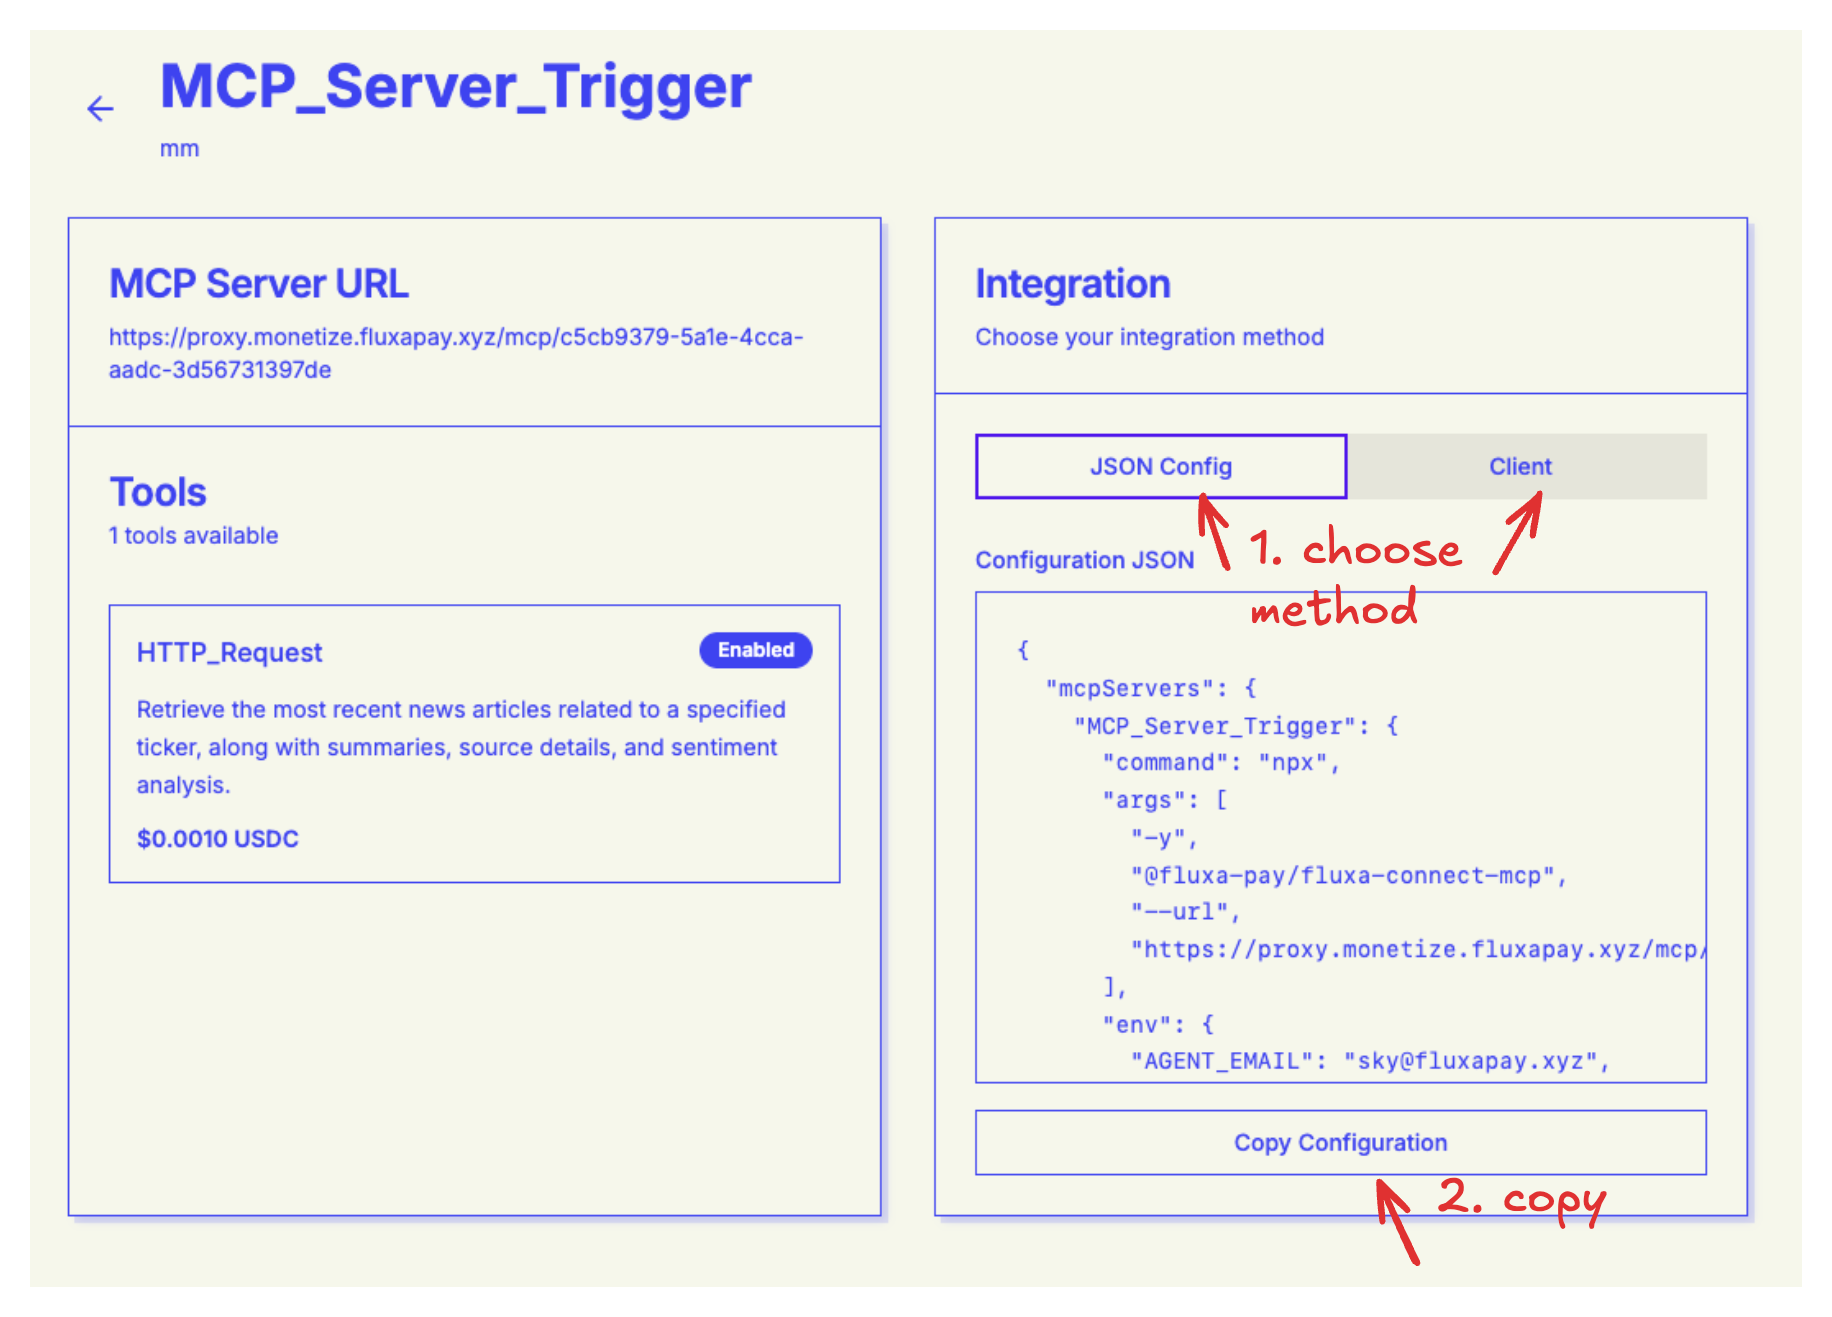
Navigate to Integration Page: Go to the MCP server's integration page to access the configuration.
Copy Configuration: Copy the provided JSON configuration snippet from the integration page.
Add to Settings: Paste the configuration into your platform's configuration file (
.mcp.jsonor.qwen/settings.json).Restart Client: Restart your AI client to activate the integration.
Success
The MCP server tools will now be available for use in your AI client.
Start Using: The MCP server tools are now available in your workflow. You can start invoking them through your AI client.
Method 2: Client Integration
The Client method provides a programmatic way to integrate MCP servers, offering more flexibility and control over the integration.
Supported Platforms
Claude Code - Full support for client-based integration with programmatic API access
How to Use
- Install Client Library: Copy the config into your terminal. The variables will have been filled out for you.
claude mcp add-json <WORKFLOW_NAME> '{"command":"npx","args":["-y","@fluxa-pay/fluxa-connect-mcp","--url","https://proxy.monetize.fluxapay.xyz/mcp/<CONFIG_ID>"],"env":{"AGENT_EMAIL":"<YOUR_EMAIL>","AGENT_NAME":"Claude Code - agentwallet.fluxapay.xyz","CLIENT_INFO":"Claude Code on macOS"}}'- Check MCP Status for Claude Code:
claude mcp listIt should show connected and you can start using the MCP service.
Usage and Billing
Once integrated, you can start using the MCP server's tools in your workflows. Usage is tracked automatically, and you'll be billed based on:
Number of Tool Invocations
Each time you call a tool, it counts as one invocation. The pricing is per-invocation.
Tool-Specific Pricing
Each tool has its own price set by the seller. Prices can vary based on the computational cost and value of each tool.
Usage Patterns
Your total cost depends on how frequently you use the tools and which tools you invoke.
Cost Management
Review the tool pricing on the integration page before using expensive tools to manage your costs effectively.
Next Steps
- Use APIs → - Learn how to integrate monetized APIs
- Sell Your MCP Server → - Monetize your own MCP server